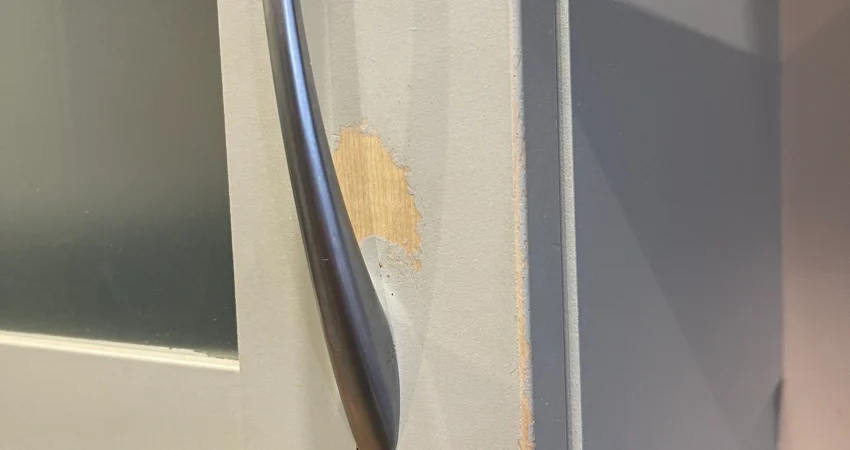
Common Mistakes To Avoid When Spray Painting Kitchen Surfaces
When it involves home development initiatives, spray-painting kitchen surfaces can appear smooth & speedy to replace the appearance of your kitchen. However, without proper instruction and technique, it may easily result in a messy, unsatisfactory results. Many amateur DIYers make simple yet essential mistakes that leave their kitchens streaked, dripped, or simply chippy.
Common mistakes to avoid when spray painting kitchen surfaces are not vigorously cleaning with the right products and making the surface ready for spraying. Any grease, dirt, or cleaning soap residue left on cabinets, walls, or countertops will prevent the brand-new paint from properly adhering. Be certain to thoroughly wash all surfaces with the right degreaser and allow them to dry before applying any spray paint.
While the guidance work is essential, the real spraying technique is just as vital to get right. Spray painting requires a fair, sweeping motion approximately 6 inches from the surface to avoid drips, sags and uneven coverage. Move the spray unexpectedly without hesitating or focusing too long on one location. Applying multiple thin coats allows you to slowly build up to a smooth, constant finish.
For more information on getting quote from Dynamic Spray experts,
simply fill in the form by clicking the link below:
QUOTE
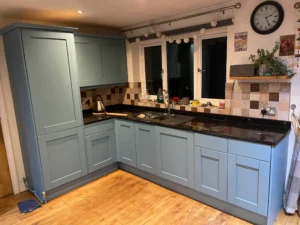
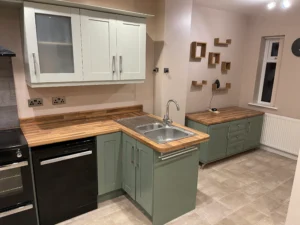
Avoid These Common Mistakes When Spray Painting Kitchen Surfaces
- Don’t use the wrong type of paint. Use correct spray paint designed especially for kitchen surfaces such as cabinets, countertops, home equipment, etc. Avoid popular wall paints like emulsion.
- Properly prepare the floor and surroundings. Clean very well, sand, and high any surfaces before spraying to help the paint adhere higher.
- Avoid overspray. Use painter’s tape, tack cloths, and tarps to mask off any areas you do not need to colour. Overspray can harm countertops and home equipment.
- Don’t practice too much paint too fast. Multiple thin coats are better than one thick coat. Thick coats can drip or run if not done by a professional
- Don’t ignore drying times. Follow the manufacturer’s recommendations for drying between coats. Rushing the process can lead to tacky or weakened paint.
- Maintain proper spray distance. Holding the can too close can lead to drips and runs. Holding it too far can make the paint dry before adhering.
- Watch for drips. Paint can pool and drip along the undersides of cabinets and countertops if you aren’t careful.
- Avoid painting in high humidity, direct sunlight, or cold temperatures. This can negatively impact the final finish.
- Be patient. Spray-painted surfaces may require several days of curing time to fully harden and become durable. Don’t replace items too soon.
Properly Prep Before Spray Painting Surfaces
Thoroughly washing and degreasing all surfaces before painting is critical. Use an appropriate degreaser and thoroughly scrub all cabinets, walls, countertops, and any other surfaces to remove any grease, dirt, or soap residue. Ensure you get into cracks and corners. Let all areas dry completely afterward. Drying time can take hours or overnight depending on humidity.
Thoroughly Wash and Degrease All Surfaces
It is extremely important not to rush the preparation process. Allowing ample dry time ensures the paint will properly stick. If any dampness remains, the paint will peel or flake off shortly after application. Be patient even if it requires letting surfaces dry out for 24 hours or more. Taking shortcuts risks wasting time and money.
Allow Ample Time for Complete Drying
| Surface Type | Ideal Drying Time |
| Wood Cabinets | 12-24 hours between light coats 4-7 days full cure |
| Laminate Countertops | 1-2 hours between light mist coats 3 days full cure |
| Tile Backsplash | 30-60 mins between thin coats 3 days full cure |
| Painted Walls | 1-hour recoat 4-7 days full cure |
| Metal Fixtures | 30-60 minutes per coat 5-7 days full cure |
| Appliances | Remove & spray separately. Cure 7+ days before replacing |
- Drying times vary based on humidity, ventilation, number of coats, heat and paint type
- Rushing between coats or using the surface to soon risks permanent paint damage
- Patience allows thorough curing to maximize paint adhesion and durability
Be sure to follow manufacturer guidelines on recoat times and full cure requirements before actively using newly painted kitchen items to avoid premature damage. Proper planning prevents peeling or failed paint jobs. Rushing the curing process leads to common mistakes to avoid when spray painting kitchen surfaces. Allowing ample drying time ensures durable results.
Sanding glossy areas first creates a rougher texture that spray paint can adhere to much better. Lightly sand any shiny or slick areas on cabinets, tile backsplashes, or laminate countertops with fine-grit sandpaper. Avoid scrubbing too aggressively or you may damage the underlying surface. The goal is just to scuff up the gloss so the new paint has something to grip.
Sand Glossy Areas to Improve Paint Adhesion
Common mistakes to avoid when spray painting kitchen surfaces are to make sure you wash again after sanding to remove all dust residue which could also impede proper paint bonding. Remember that thorough prep work is tedious but necessary. Proper adhesion prevents peeling and guarantees your fresh paint job lasts.
Use Proper Spray Painting Technique
Maintaining a consistent one-foot distance from the surface is key to avoiding drips or thin coverage. Position the spray paint can around 12 inches away as you apply smooth, even strokes. Carefully sweep your arm across while spraying instead of focusing the paint stream on one area for too long. The paint should be evenly discharged in a fine mist.
Maintain a Consistent 6-8 inch Distance from the Surface
Common mistakes to avoid when spray painting kitchen surfaces. Move at a steady pace as you spray, being very careful not to hesitate in one spot. Quick sweeps across all areas prevent paint build up and drips. Avoid stopping mid-stroke or doubling over already coated territory until the paint dries. The patient, methodical technique provides professional-looking results.
Employ Smooth, Sweeping Motions
Applying multiple thin layers creates a smooth, consistent finished product. Mist on an even first coat across all surfaces. Then allow adequate drying time based on paint specifications before applying the next light layer. Slowly building up paint film with several coats avoids unattractive drips and streaks.
Apply Multiple Thin Coats for Even Results
Patience equals perfection when spray painting kitchen surfaces. Resist the urge to rush through the project or skip drying times between coats. Common mistakes to avoid when spray painting kitchen surfaces. Carefully follow all instructions for proper applications and drying yields a flawless, durable finish that looks factory-applied.
Carefully Choose Your Paint Product
Choosing the right spray paint formula promotes maximum adhesion and durability. Consult manufacturer guidelines and select specialty spray paints designed specifically for different kitchen surfaces like ceramic tile, laminate, metal, or wood. Premium spray paint formulated for that substrate will bond tightest and last longest. Dynamic Spray go to all around paint is from PPG
Select Specific Formulas Based on Surface Type
Common mistakes to avoid when spray painting kitchen surfaces, it consider the final sheen you desire. Options typically include high gloss for a shiny aesthetic, satin for muted luster, or matte for a flat, understated look. Make sure to buy the proper spray paint finish suited for your kitchen décor style. Semigloss paints offer a compromise between glossy and flat.
Consider Finish Options Like High Gloss or Matte
Investing in reputable brand name spray paint pays off long term by providing excellent coverage that resists fading and wear. PPG HMG or lecher offer top-quality results though at a higher cost than generic non industrial paint systems. Premium paints apply smoother and often include prime resins that outlast cheaper formulations.
Exercise Caution Around Sensitive Areas
Completely cover nearby countertops, appliances, and sink areas with drop cloths before spray painting to prevent unwanted paint marks. Tape down the edges of plastic sheeting to seal off sensitive zones like oven ranges or refrigerators. Preventing overspray mishaps requires taking protective measures.
Completely Cover Countertops and Appliances
| Surface Type | Recommended Covering Method |
| Countertops | Drop cloths, plastic sheeting, taped-down paper |
| Appliances | Remove if possible, otherwise use drop cloths/plastic |
| Sinks | Loose-fit plastic bags secured with painter’s tape |
| Fixtures | Painter’s tape to seal off valves, handles, edges |
| Floors | Drop cloths, brown paper, cardboard, painter’s tape |
| Nearby Rooms | Close doors, and seal them with painter’s tape/plastic |
Tips for Protecting Surfaces When Spray Painting Kitchen
- Overlap sheets of plastic/drop cloths to prevent overspray gaps
- Use painter’s tape for plastic edges to seal tightly with no openings
- Ensure appliances are unplugged before covering
- Check to cover integrity frequently while spraying
- Inspect and re-cover between coatings as needed
Taking thorough precautions shields unaffected kitchen areas and valuables from accidentally getting spray painted. Proper preparation minimizes overspray risks and clean-up later. Covering thoroughly prevents common mistakes like paint damage when spray painting kitchen surfaces. With careful masking and taping, you can avoid mishaps.
Apply painter’s tape to wall trim, window frames, light fixtures, or any other areas that are kitchen surfaces about to be painted. The tape preserves clean delineation between old and new paint. Remove the tape immediately after finishing the final coat. Letting tape remain too long risks bonded paint edges peeling up when the tape gets peeled off.
Use Painter’s Tape to Protect Trims and Edges
Use extreme care when spray painting around sinks, faucets, soap dispensers, or handles. Precision aim with spray nozzle prevents messy drips which are difficult to remove from metallic or chrome fixtures. Any unwanted paint specks on these surfaces stand out starkly against the original finish. Work slowly and discharge spray at a proper distance.
Allow New Paint to Fully Cure Before Use
Review manufacturer drying recommendations and wait the full duration before actively using newly painted areas. Although paint may feel dry to the touch in under an hour, full curing and hardness development take much longer. Common mistakes to avoid when spray painting kitchen surfaces, like failing to let paint fully cure. Premature use risks permanent damage to the fresh paint film or cause reactions.
Run Vents/Exhaust Fans to Accelerate Drying
Common mistakes to avoid when spray painting kitchen surfaces include neglecting proper ventilation. To ensure a smooth and efficient spray painting process, it is crucial to run ceiling fans, exhaust hoods, HVAC and ventilation systems.
Improved air circulation provided by these mechanisms not only accelerates spray paint drying time but also effectively whisks away paint fumes, facilitating the release of solvents. This, in turn, significantly reduces the full curing requirements, making kitchens safe for use sooner. These chemicals are extremely dangerous and very hazardous to your health.
It is essential to exercise caution when using fans to expedite the drying process. Ensure that the air streams from fans do not inadvertently blow dust onto freshly painted surfaces, as this can result in imperfections. By incorporating proper ventilation practices, you can avoid this common mistake and achieve a professional and flawless finish on your kitchen surfaces. Ensure the fans are outside of the building and that you have ducting inside the building for less contamination.
Don’t Wash or Put Stress on Surfaces Too Soon
Common mistakes to avoid when spray painting kitchen surfaces involve neglecting crucial post-application care. After completing the spray painting process, it is imperative to avoid cleaning, abrasive scrubbing, or placing any items on spray-painted kitchen surfaces for at least one week after application. Allowing ample curing time strengthens paint adhesion and hardness before subjecting it to normal kitchen stress. Though tempting to use the updated space immediately, be patient.
Evaluating Pros and Cons: Spray Painting Kitchen Surfaces Without These Mistakes
Spray painting kitchen cabinets, countertops, and appliances allows you to affordably update the look of your space. However, rushing the process leads to mistakes like drips, uneven coverage, and poor adhesion. Proper preparation and application techniques are essential for smooth, durable results.
The pros of spray painting include efficiency and a sleek finish when done correctly. Cons include tacky, chipped paint when proper materials aren’t used or adequate drying time isn’t allowed. Careful prep work, light coats of paint, and patience yield professional-looking, long-lasting results and avoid common mishaps.
Expert Advice: How to Sidestep Common Mistakes in Spray Painting Kitchen Surfaces
Experts emphasize proper prep like cleaning, sanding, and priming surfaces before spray painting kitchen cabinets or countertops. This helps the paint adhere evenly. Select high-quality kitchen paints and maintain proper spray distance to avoid drips or thin coverage. Allow adequate drying time between light coats.
Common mistakes to avoid when spray painting kitchen surfaces, experts suggest carefully masking off areas prone to overspray before painting. It’s important to avoid common mistakes like failing to properly prepare the area when spray painting kitchen surfaces.
Control humidity and temperature during application for ideal results. Apply multiple thin coats rather than one thick coat, holding the can 6-8 inches from the surface. Let each coat dry completely before the next application.
Frequently Asked Questions
What type of paint should be used?
High-nice spray paint formulated especially for kitchen surfaces.
How ought the surface be prepped?
Clean very well, sand, and high the surface before spraying.
What’s the nice manner to keep away from overspray?
Use painter’s tape, drop cloths, and tarps to mask off regions.
What spraying technique needs to be used?
Apply more than one thin coat as opposed to one thick coat.
How long need to each coat dry earlier than the following?
Follow the manufacturer’s hints for drying instances among coats.
What will the spray distance be?
Hold the can 6-8 inches away to keep away from drips or skinny insurance.
What environmental conditions should be prevented?
High humidity, direct sunlight, and bloodless temperatures.
Why is patience essential?
Surfaces need sufficient time to completely therapy and harden after painting.
Conclusion for common mistakes to avoid when spray painting kitchen surfaces
Transforming your kitchen with a fresh coat of spray paint can be an affordable DIY project. However, to get great results, it’s essential to avoid some common mistakes when spray painting kitchen surfaces. Proper preparation and technique will help you achieve a smooth, durable finish. Before painting, thoroughly clean and sand all surfaces to ensure proper adhesion.
Common mistakes to avoid when spray painting kitchen surfaces Prime any necessary areas, and carefully mask off nearby walls, countertops, floors, etc. to prevent overspray. When painting, use light coats and maintain the proper spray distance to prevent drips or thin coverage. Be sure to use high-quality spray paint specially formulated for kitchen surfaces. Proper drying time is also key when spray painting kitchen surfaces. Follow the manufacturer’s recommendations, allowing ample time for each coat to dry fully before adding another.
After painting, give the surfaces a few days to cure completely before replacing any items. Rushing the prep work, application, or drying time can result in problems like tacky paint, chipping, and uneven finishes when spray painting kitchen surfaces. With careful preparation, proper technique, high-quality materials, and patience, you can avoid common mistakes and give your kitchen an affordable makeover with smooth, durable spray-painted surfaces.
If you would like an expert to contact you for more information regarding the question
‘ common mistakes to avoid when spray painting kitchen surfaces ‘
then here are our contact details

address:
Dynamic spray ltd
Unit 1, Red Rose Works
Shaw road
Royton, Oldham
Ol2 6EF
Contact:
07506922804
Sales@dynamicsprayuk.co.uk
